Job Post & Search Documentation
Please navigate on the left to find instructions on how to use, edit, and add to your Job Post and Search function.
For further assistance, please email us at support@logicwebmedia.com.
Adding a New Job
Here, we will review the 3 simple steps to adding a new Job Post. Once the Job Post is published, you will have the option to edit it or delete it.
Step 1:
Login to the WordPress dashboard using your assigned credentials. You can login at YourDomain.com/wp-admin.
Note: Replace YourDomain.com with the domain name for your website.
Step 2:
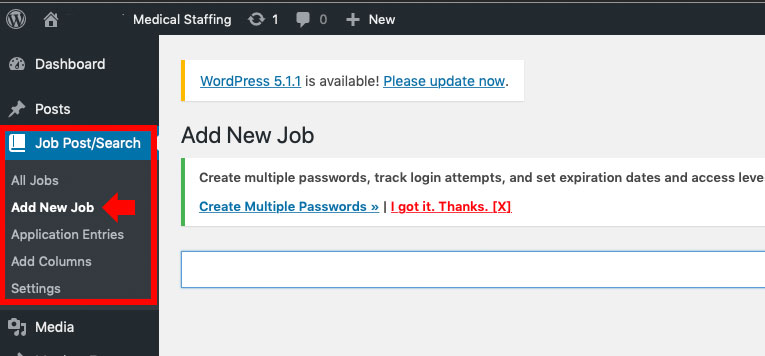
On the left side of the WordPress Dashboard, find Job Post/Search and click on Add New Job. See Image Below
Step 3:
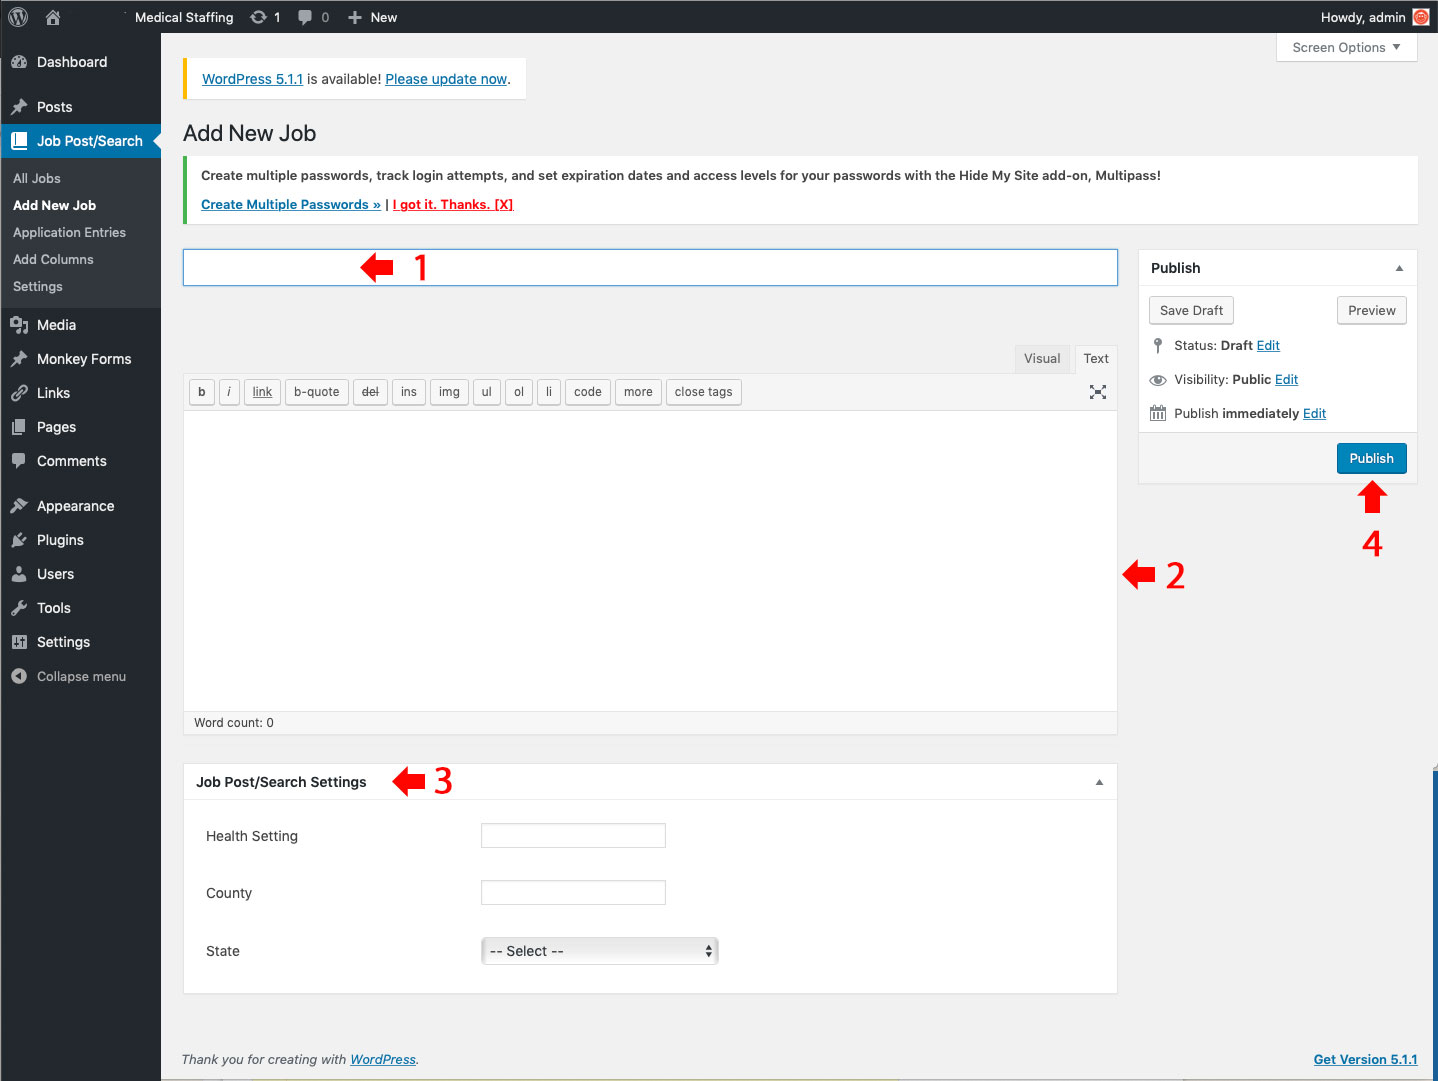
Fill out the highlighted fields, and click the blue Publish button. See Image Below
Examples from Image Below:
1: This is the title of your Job Post
2: This is the Description of your Job Post
3: This is the Job Post/Search Settings field that was set up initially by Logic Web Media, and can be edited under the Advanced Options portion of this documentation.
4: Click Publsih to make the New Job active.
Edit an Existing Job
Here, we will review the simple steps to editing Job Post.
Step 1:
Login to the WordPress dashboard using your assigned credentials. You can login at YourDomain.com/wp-admin.
Note: Replace YourDomain.com with the domain name for your website.
Step 2:
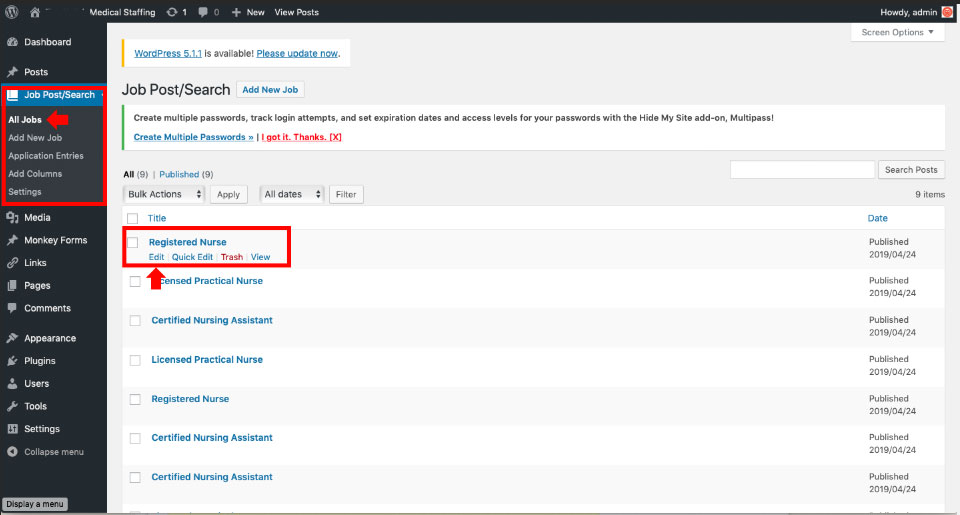
On the left side of the WordPress Dashboard, find Job Post/Search and click on All Jobs.
Step 3:
Hover over the job post you would like to edit, and click Edit. See Image Below
Step 4:
Follow the steps contained in the image, and click the blue Update button. See Image Below
Steps from Image Below:
1: Edit content
2: Edit Job Post/Search Settings
4: Click Upate to save your changes

Receiving Entries
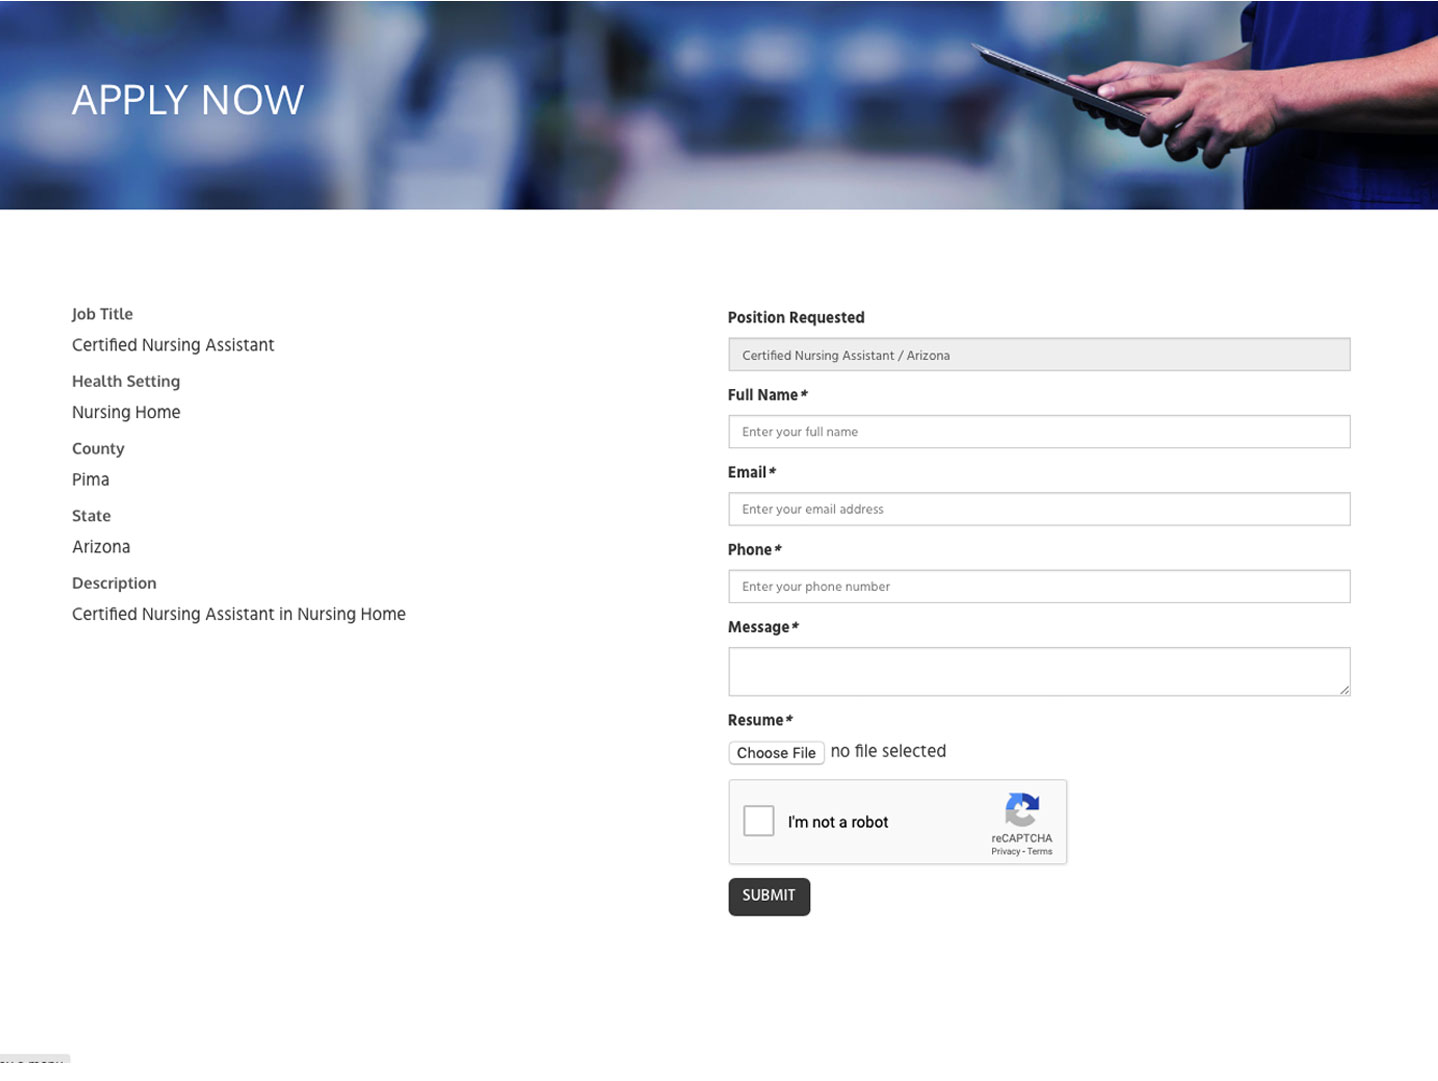
When someone fills out an application for a specific job within the Job Search section of your website, you will be notified via email to your preferred email address. You can change this email address under the Advanced Options section.
You will need to login to WordPress to receive these entries. The system will not email the persons information or resume, in order to maintain privacy, as well as to ensure there are no sending issues or spam blocking issues.
Step 1:
Login to the WordPress dashboard using your assigned credentials. You can login at YourDomain.com/wp-admin.
Note: Replace YourDomain.com with the domain name for your website.
Step 2:
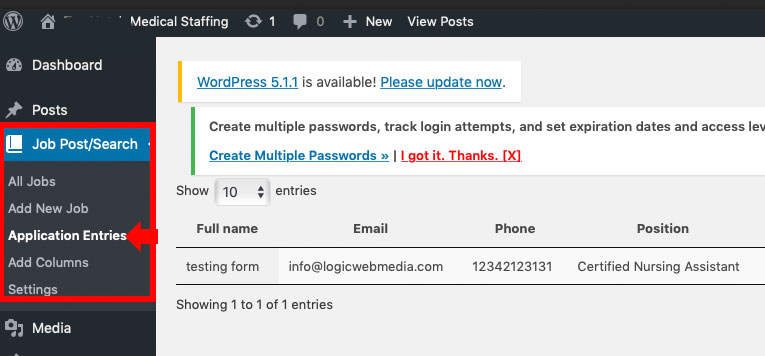
On the left side of the WordPress Dashboard, find Job Post/Search and click on Application Entries. See Image Below
Step 3:
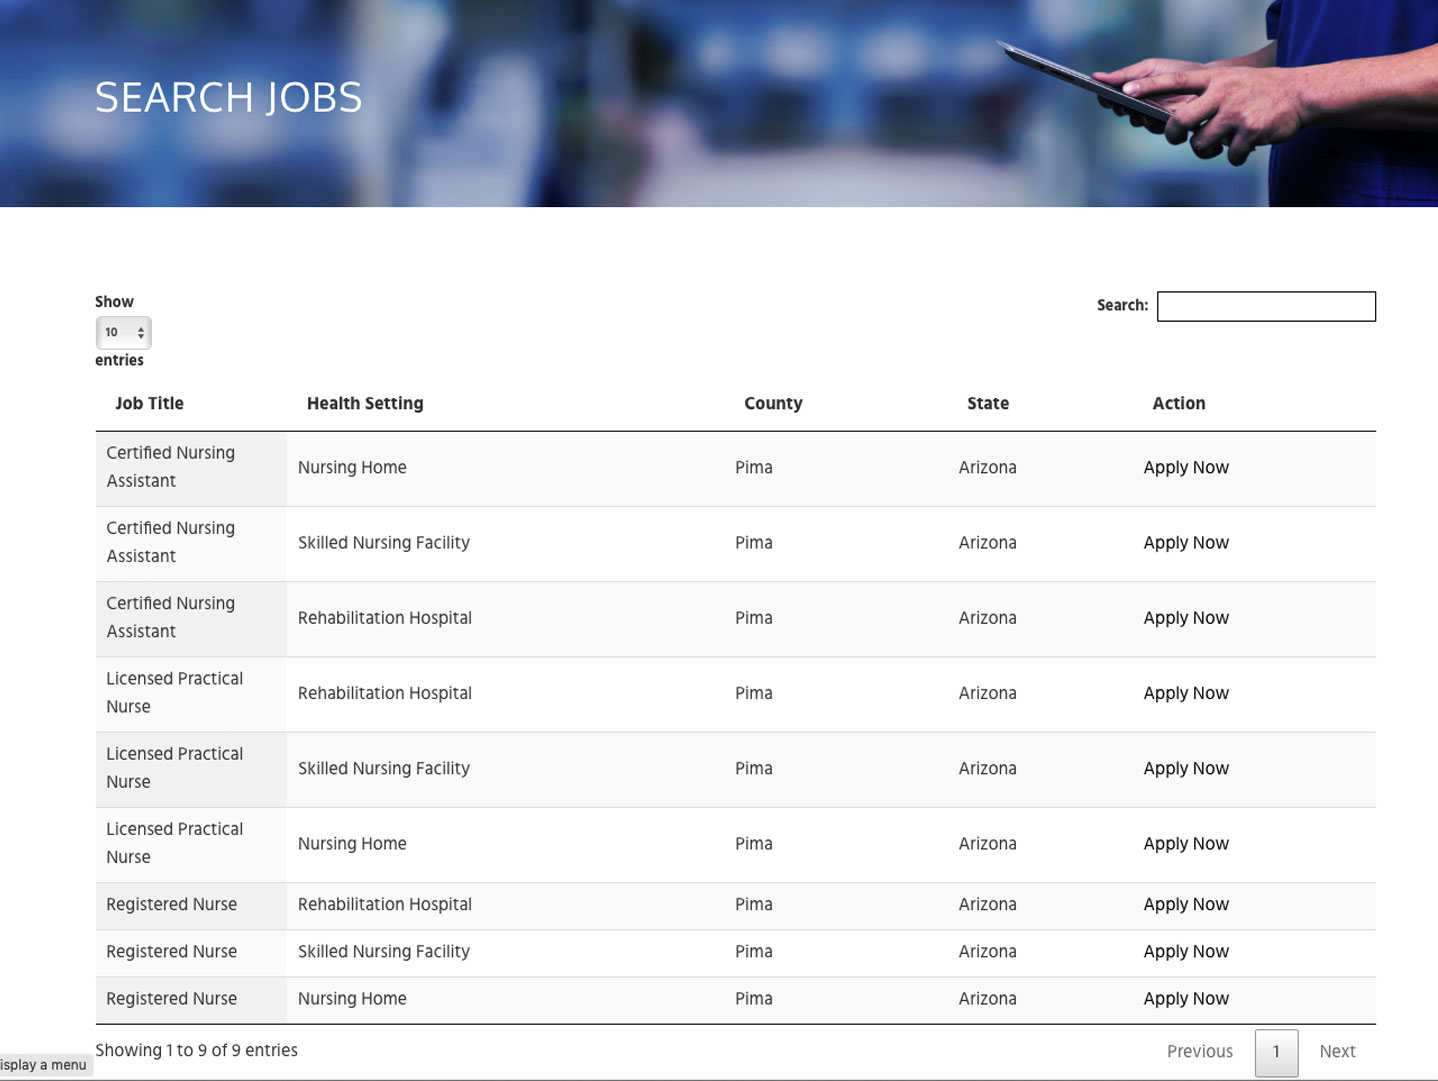
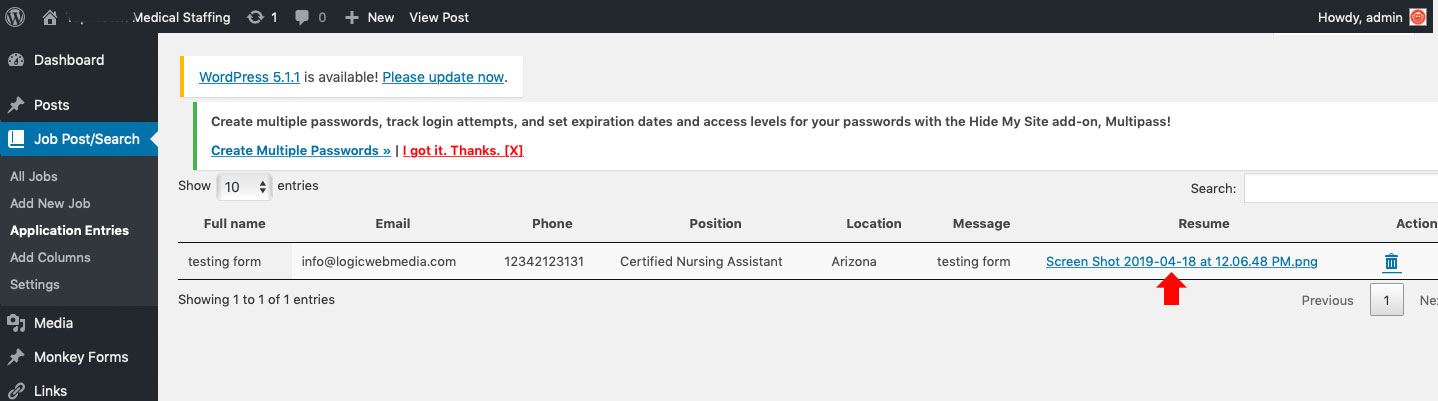
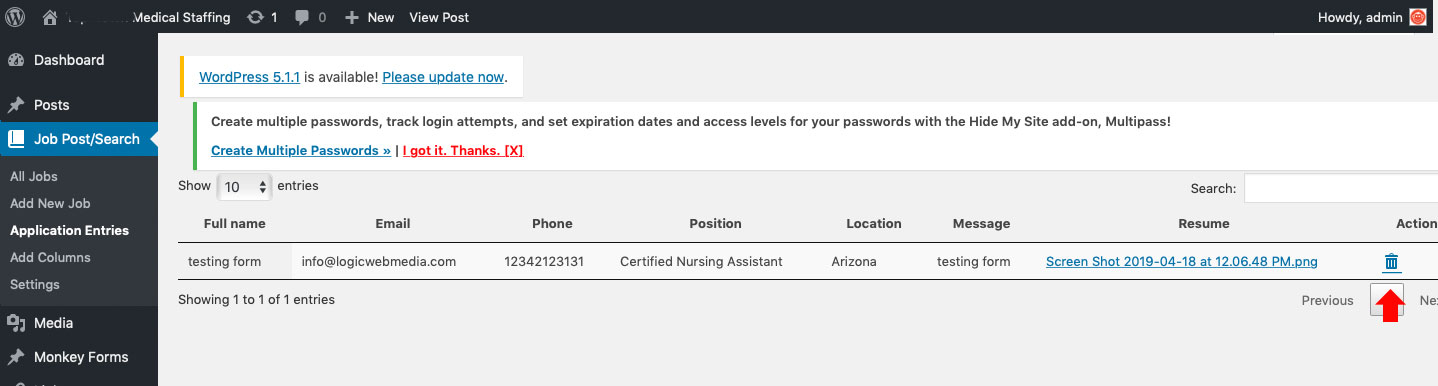
You will see a full list of entries. You can scroll through, change the amount shown, or search for a specific entry.
When you find the correct entry, simply click the resume link to view and download. See Image Below
Step 4 (Optional):
You can delete entries by clicking the blue trashcan symbol next to the resume link. It is important to delete entries regularly in order to ensure proper health and speed of you website. See Image Below
Warning: Deleting an entry from this area of the WordPress dashboard will delete the data forever. Any entries that are deleted will be lost and cannot be recovered.
Add New Job Columns
The Job Post functions and settings will be setup during your initial website build by Logic Web Media. After the website is up and running, you may need to adjust your settings. This portion of the documentation will show you how.
Step 1:
Login to the WordPress dashboard using your assigned credentials. You can login at YourDomain.com/wp-admin.
Note: Replace YourDomain.com with the domain name for your website.
Step 2:
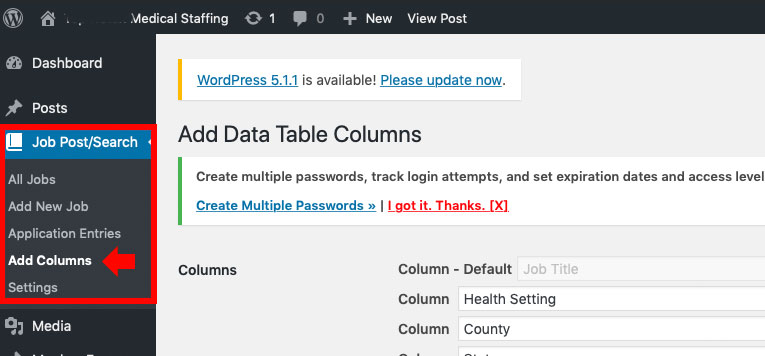
On the left side of the WordPress Dashboard, find Job Post/Search and click on Add Columns. See Image Below
Step 3:
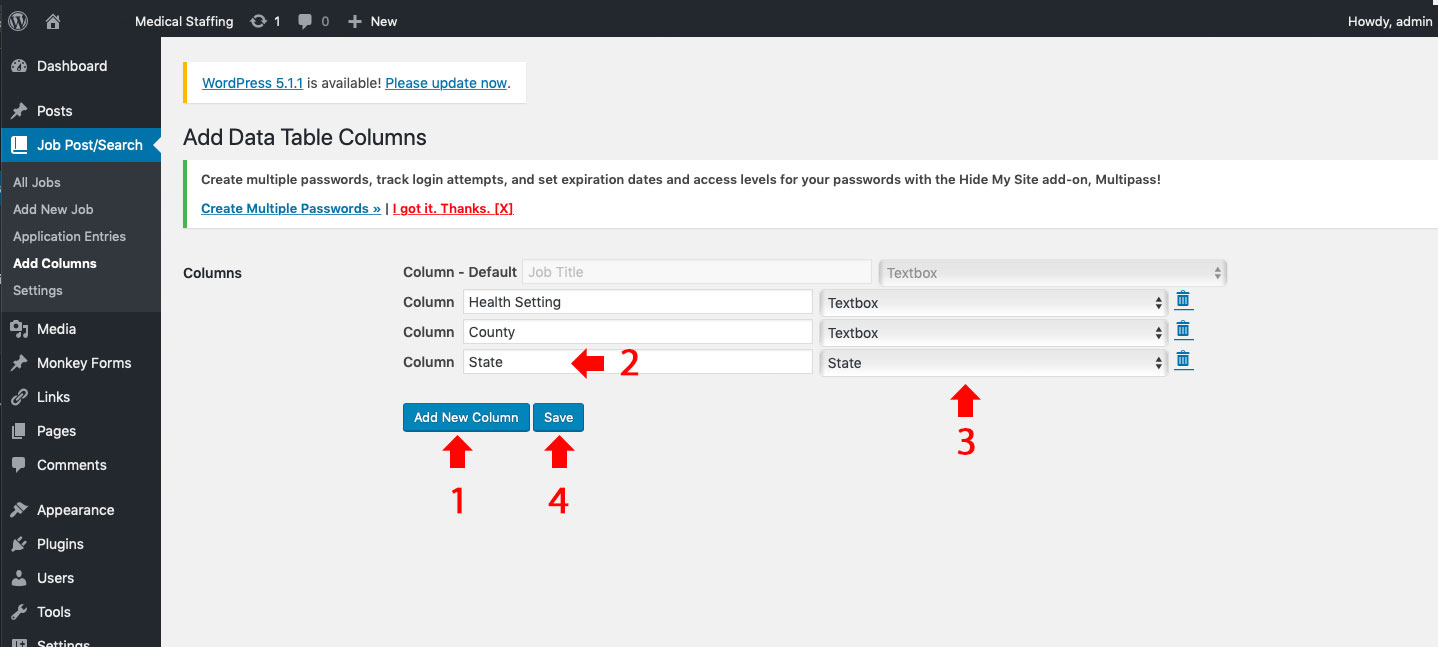
Follow the steps contained in the image, and click the blue Save button. See Image Below
Steps from Image Below:
1: Click Add New Column
2: Enter Column heading
3: Select the Type of Field. (Textbox is one line, Textarea is multiple lines, and State will return all US State abbreviations)
4: Click Save to make the new column active.
You will need to edit each Job Post individually to put content in the field. Example: If you added a column called "Type of Job," you will need to add to each job post what the type of job is.
Delete Job Columns
Warning: Deleting a column from this area of the WordPress dashboard will delete the data forever. Any content added to those fields on the Job Post, will be lost and cannot be recovered.
If a column on your Job Post and Search is no longer needed, this portion of the documentation will show you how to delete it.
Step 1:
Login to the WordPress dashboard using your assigned credentials. You can login at YourDomain.com/wp-admin.
Note: Replace YourDomain.com with the domain name for your website.
Step 2:
On the left side of the WordPress Dashboard, find Job Post/Search and click on Add Columns. See Image Below
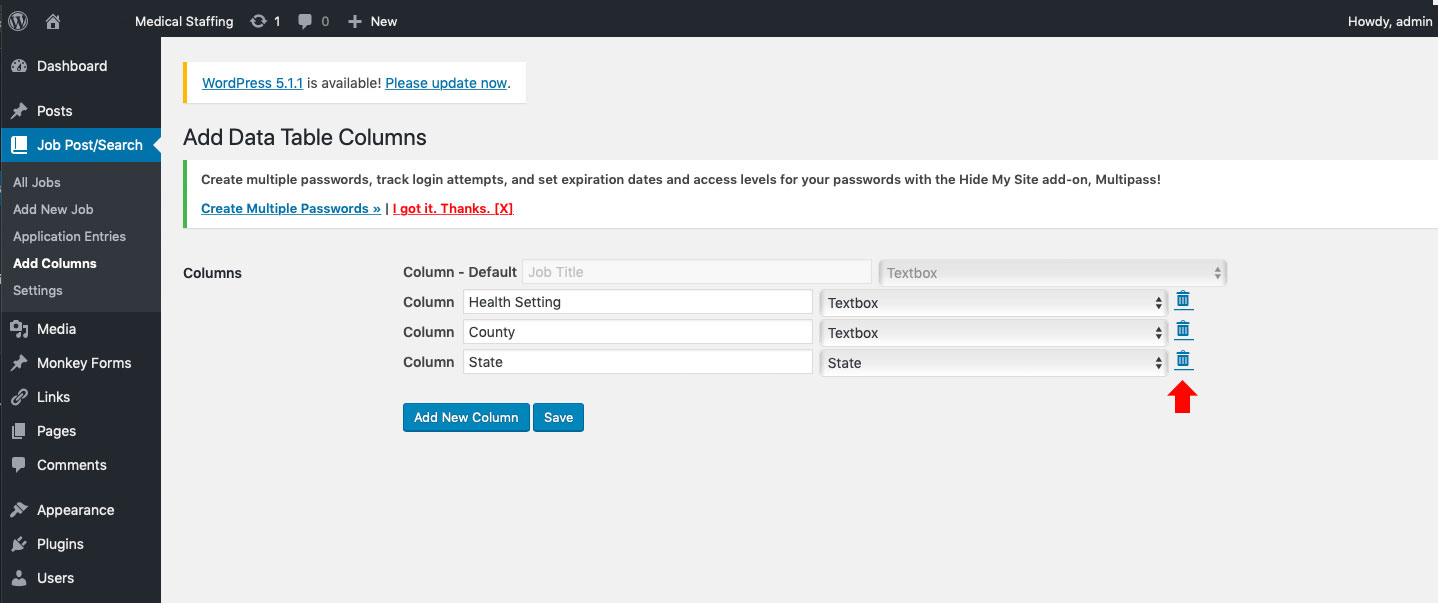
Step 3:
Next to the column you wish to delete, find the trashcan symbol and click to delete. See Image Below
Change Receiver Email
You can change the email address that receives the notifications when a user applies to a specific job. Follow the steps below.
Step 1:
Login to the WordPress dashboard using your assigned credentials. You can login at YourDomain.com/wp-admin.
Note: Replace YourDomain.com with the domain name for your website.
Step 2:
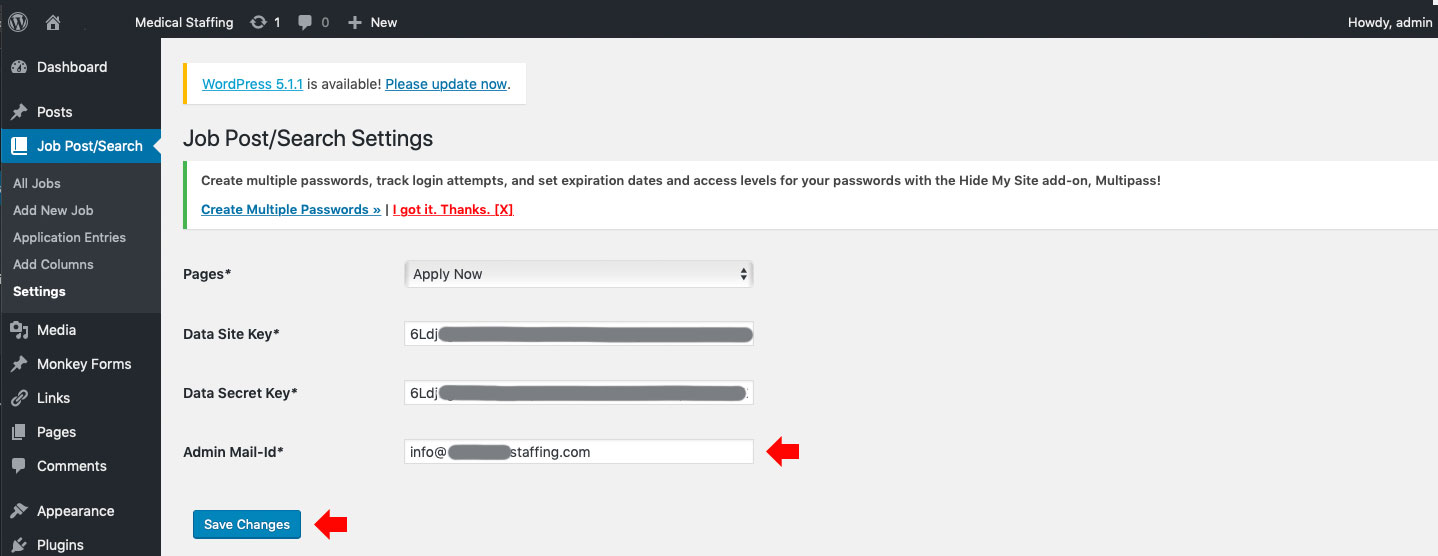
On the left side of the WordPress Dashboard, find Job Post/Search and click on Settings. See Image Below
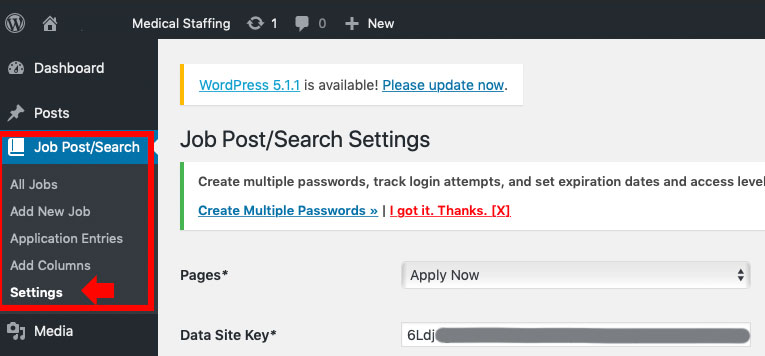
Step 3:
Change the field Admin Mail-Id*, and click the blue Save Changes button. See Image Below